
FKA Facebook Pixel
The Meta Pixel (formerly known as the Facebook Pixel) is an essential tool in your Facebook marketing belt.
If you’re using Facebook ads, there’s one tool you should start using to get the most out of your social ad budget: the Facebook pixel (now Meta Pixel).
Tracking where website traffic comes from, what actions people take on your website, and serving them remarketing ads is a must for any business that sells products or services online.
The Meta Pixel also helps you collect customer information which can be used to create custom audiences and more.
Let’s explore the Meta Pixel, how to create one, and how to install its code on your website.
What is the Meta Pixel?
If you’re already familiar with the Facebook Pixel, the Meta Pixel is precisely the same, with a minor facelift.
Have you ever clicked on a business’ website to browse its products, only to start seeing its ads on Facebook and Instagram? Well, that’s all thanks to a pixel, a simple practise known as “remarketing”.
Additionally, pixels use cookies to track the actions people take on your website. Whether someone makes a purchase or simply adds something to their cart, a pixel will mark these actions as “events”. Collecting these “events” allows you to track, analyse, and adjust your overall Facebook marketing strategy.
Meta Pixel Events
According to Meta, there are 17 standard Pixel events you can track:
- Add Payment Info
- Add to Cart
- Add to Wishlist
- Complete Registration
- Contact
- Customise Product
- Donate
- Find Location
- Initiate checkout
- Lead
- Purchase
- Schedule
- Search
- Start Trial
- Submit Application
- Subscribe
- View Content
You don’t have to track all these events, but it’s nice to have the flexibility to suit your business’ marketing goals. Learn all about the Event Setup Tool.
What about third-party tracking in iOS?
Unless you’ve been living under a digital rock, you’ve likely heard about the changes to third-party tracking in iOS, which allows users to choose whether or not they want to allow individual apps to track their usage.
While these changes will undoubtedly impact the effectiveness of the Meta Pixel, it’s essential to keep in mind that most users browse Facebook on non-iOS devices like Android and Windows computers.
How to set up the Meta Pixel
Before you get started setting up your Meta Pixel, there are a few things you need to sort out first:
1. You need to have a website for your business
2. You must be able to edit your website’s code
Note: if updating your website’s code is beyond your reach, we’ll show you how to send all the information to whoever looks after your website.
Directly from Meta, here’s how to set up a Meta Pixel:
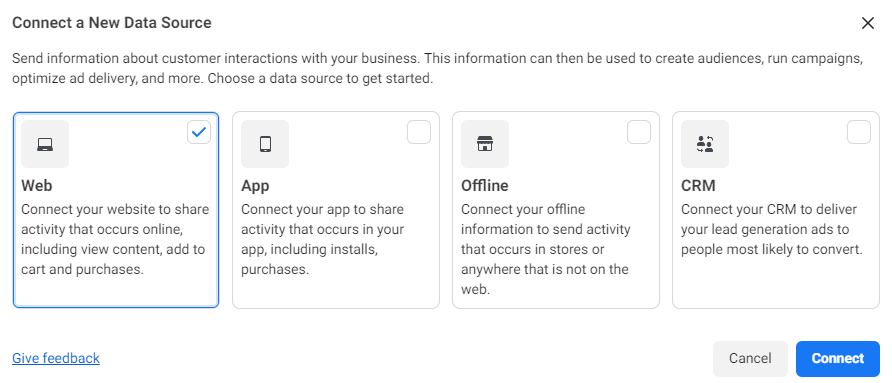
- Go to Events Manager.
- Click
Connect Data Sources and select Web.
- Select Meta Pixel and click Connect.
- Add your Pixel Name.
- Enter your website URL to check for easy setup options.
- Click Continue.
Note: When choosing a name for your Meta Pixel, remember that the name should represent your business and not a specific campaign. You only get one Meta Pixel per ad account.

Installing the Meta Pixel on your website
After creating your Meta Pixel, you need to add its code to your website.
- Go to Events Manager.
- Click the
Data sources icon on the left side of the page.
- Select the Pixel you want to set up.
- Click Continue Pixel Setup.
- Select Meta Pixel and click Connect.
- Select Install code manually.
- Copy the Pixel base code.
- Find the header of your website, or locate the header template in your CMS or web platform.
- Paste the base code at the bottom of the header section, just above the closing head tag
- Click Continue.
- Optional: Toggle on Automatic Advanced Matching and verify the customer information you want to send.
- Click Continue.
- Add events using the Event Setup Tool or by manually adding code to your website.

How do I send instructions to someone else?
If someone else updates the code on your website, simply follow the steps below to email them Meta Pixel setup instructions:
- Go to Events Manager.
- Click the
Data sources tab on the left side of the page.
- Select the Pixel you want to set up.
- Click Continue Pixel Setup.
- Click Email Instructions.
- Enter the recipient’s email address.
- Click Send at the bottom of the page.
You’re all set to go!